No categories assigned
Piano Expander based on Pianoteq and Odroid-N2
-
- Last edited 4 years ago by Bernhard Naegele
-
Contents
Intention
- The intention behind this project was to bring the best piano emulation software together with the best fitted application processor module to build a real rugged high quality piano expander for stage usage.
- While reading in the Pianoteq User Forum I have seen some interrest in running Pianoteq on Raspberry PI.
- For my opinion the Raspberry Pi 4 is a nice application processor module, but it is really not good suited for audio applications. You have to add an expensive extension board for getting good audio performance.
- Some other application-processor-modules (maker boards) are not so well knows as the Raspberry PI, but have sometimes better CPU performance and much better audio peripherals integrated on the silicon or on the board. Therefore there is no need for cost sensitive components to get a usable audio device.
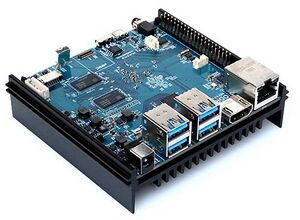
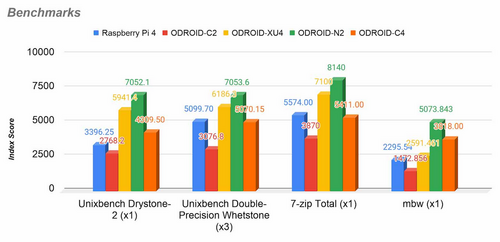
- The Hardkernel Odroid-N2 seems to be such a CPU board. It seems to have better CPU performance (6x ARM 64bit Cores running up to 1.8 GHz) in comparison to the Raspberry Pi 4 - is thermaly integrated into a well designed heatsink which prevents the cores from thermal throttling even at high cpu load.
- The benchmark shown on the picture above is provided without guarantee of correctness - it is so shown on the Hardkernels Odroid-C4-Web-Page.
- In addition to that it is equiped with a high performance audio DAC.
- So - why not using an Odroid-N2 in conjunction with Pianoteq 6 to design an High-Performance-Piano-Expander with as few as possible external components?
Hardware
The "Easy-Solution"
- For those who don't want to have a robust "Stage-Solution" and for those who have an external HDMI-Monitor for desktop-usage there is the possibility to use the Odroid N2 module just out of the box with few additional cost.
- This solution could look like this:
- The only additional components which I would recommend are:
- Odroid-N2 2G, about 80 Euro, e.g. at Pollin
- Odroid-N2 eMMC storage with min. 8GB, 17 Euro (better for flexibility is 16GB, 23 Euro), e.g. at Pollin
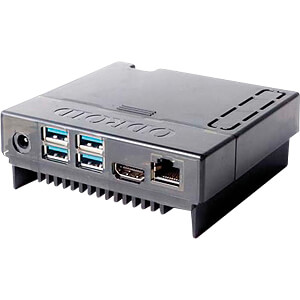
- Odroid-N2 Case, about 7 Euro e.g. at Pollin
- 12V/2.5A power-supply (maybe wall-socket adapter)
- Odroid-Batterie for the RTC (Real-Time-Clock), about 4 Euro e.g. at Pollin
- optional USB-to-MIDI adapter
- That's it!
- Compared to a Raspberry-Pi 4 where you need an additional HiFi audio board + heatsink + SD-card + power-supply + suitable housing + USB-to-MIDI-adapter you get a very cheaper and more performant solution for audio purposes.
The "Stage-Solution"
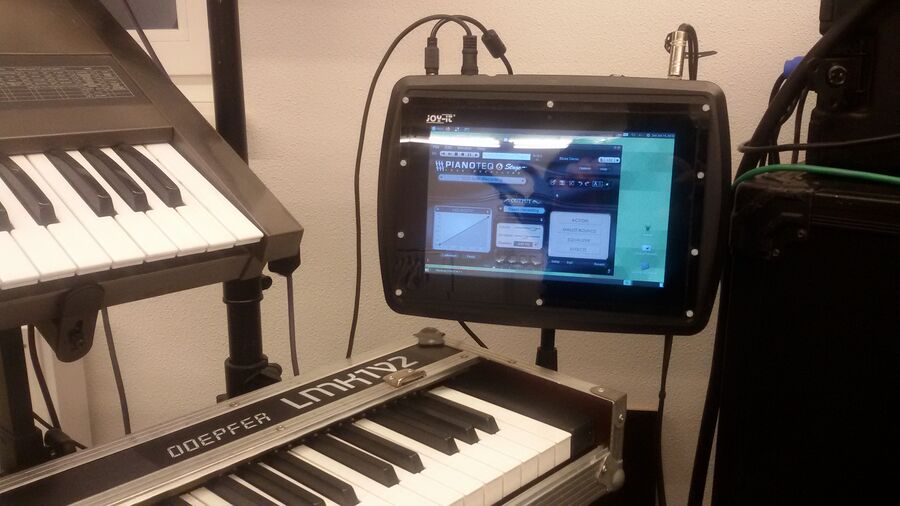
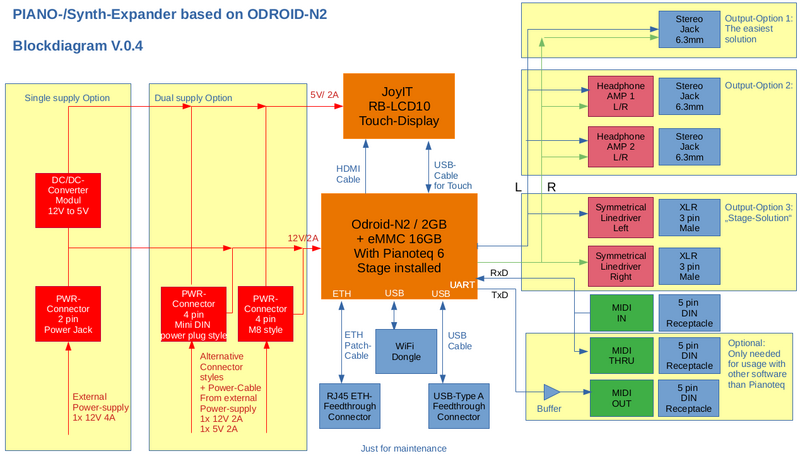
- If you want to use Pianoteq on stage it is reasonable to place the Odroid-N2 into a housing with an integrated Touch-Display. Such a solution will be described in this project.
- This solution is just the solution that was the best for me - if you are interested in building something similar please feel free to use the components which you have in your component-pool.
Block Diagram V.0.4
The Module "Odroid-N2"
- A support request at Modartt provided the Information, that Pianoteq 6 doesn't need a big amount of RAM -> therefore the cheapest Odrod-N2 version - the 2GB version is absolutely sufficient.
- Hardkernel: Odroid-N2 with 2GByte RAM, Odroid shop with short introduction and benchmark informations
- Hardkernel: Odroid-N2 with 4GByte RAM, Odroid shop with short introduction and benchmark informations
- Odroid-Wiki: Odroid-N2, many informations about Odroid-N2 and the related soft- and hardware
The Power-Supply
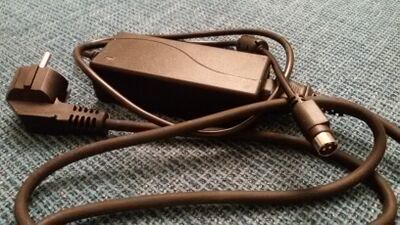
- I've found a desktop-power supply which was originaI used for an external 5 1/4 inch hard-drive. It provides 12V / 2A and 5V / 2A thus exactly what is neede for the piano expander.
- 5V / 2A for the Joy-It Touch-Display
- 12V / 2A for the Odroid-N2
- If a single-supply solution is prefered you can use e.g. these Step-Down DC/DC-Controllers to produce 5V out of the 12V input needed for the display:
Amazon: tinxi LM2596 DC-DC Step Down Spannungswandler Schaltregler + LED Spannungsanzeige or Amazon: DC-DC LM2596HV Buck Converter 5V-60V bis 1,25V-26V Step-down-Powermodul 48V 3V / 5V / 12V Spannungsregler Sunlera or similar....
The Headphone-Amplifiers
- on the prototype I want to split the audio output of the Odroid-N2 to be used for different purposes. There should be the possibility to connect at least on headphone directly - and on the other hand there should be a professional balanced XLR output. To encouple the audio output from the Odroid-N2 from the headphone-load I used two headphone-amplifier-modules which I had on my stock an which were waiting for a mission a long time.
- The two "Low-voltage-headphone-amplifiers"-modules are comming from ELV and are based on the Maxim MAX4409 headphone amplifier
- A detailed description is coming later....
XLR-Balanced OUTPUT
- coming soon
- one of the problems is the missing negative power-supply which is needed for the use of the Analog Device SSM2142 Balanced Line Drivers.
- The plan is to use a inverting charge pump with a following linear regulator for noise reduction.
The 40-pin Expansion-Connector on the Odroid-N2
- Odroid-Wiki: UART Interface on the 40 Pin Header
- Attention: Never try to drive the MIDI-Out directly from an Odroid-N2 GPIO-Pin!!! These Pins can only drive a load up to 2mA
The MIDI-Input
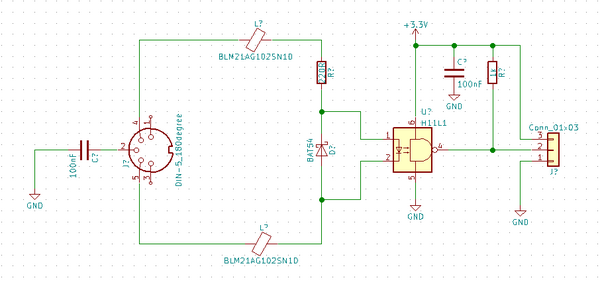
- The MIDI-Breakout-Boards used on my Expander are based on this article in the Elektor-Magazin: MIDI I/O Breakout Board supports DIN and TRS connectors
- The UART-RxD Pin of the ODROID-N2 which is used for MIDI-Input could be found on J2/Pin10 (the 2x20 header)
- For those who want to build the MIDI-Interface on a breadboard - here is the suitable schematic....
MIDI-Thru/Outputs
- The MIDI-Breakout-Boards used on my Expander are based on this article in the Elektor-Magazin: MIDI I/O Breakout Board supports DIN and TRS connectors
- The ttyS1 UART-TxD signal for MIDI-Output could be found on J2/Pin8 (the 2x20 header).
- Attention: Never try to drive the MIDI-Out directly from an Odroid-N2 GPIO-Pin!!! These Pins can only drive a load up to 2mA
- The schematic of a suitable solution is coming soon.
Mechanical Design, still work in progress + PICTURE-GALLERY
Software, still work in progress
- This small tutorial is based on the tutorial which was written by Edgar Bustamante for the the Raspberry PI 3. It is really good - therefore I use it on some parts as a blueprint.
This tutorial will explain in detail how to setup the Operating System on an Odroid-N2, how to
make the suitable change which are needed for running Pianoteq 6 and how to install and setup
Pianoteq 6 Stage in a Odroid-N2. This process is very similar to the installation on a Raspberry PI.

Pianoteq 6 running on an Odroid-N2 is just one way of getting a standalone piano expander with
high audio quality at lowest cost.
Operating System installation
- it is planned to provide here a ready-to-use Operating-System-Image for download
Pianoteq on Odroid-N2
What could be done in a better way? - A small look backward
Mechanical perspective
- most problems I had were related to the housing. The standard plastic housing with its roundings result in the problem "how and where can I place the big connectors? - especially the DIN5 connectors".
- One other problem with a plastic housing is the "wall thickness". The thick material gives you no chance to use for example small 3.5mm stereo jacks....
- some pictures for Modartt-Support
